Hello Linux-fanatics. In this tutorial, we will be discussing “How we can create a LAMP server "..
LAMP server
A LAMP server is a software stack model that is used for hosting websites & web-apps. It is extremely powerful & very eay to use. Basically name LAMP started out as a lingo but it is an acronym for
- Linux, which is an operating system. In our case, we are using RHEL/Centos 7,
- Apache, is a web server. It fetches user’s request vis HTTP/HTTPS & provide requested content,
- MariaDB, is a relational database. It is basically forked down version of MySQL server & it stores site data,
- PHP, is a scripting language used for making dynamic & interactive web-pages.But P in some LAMP stacks can also mean Perl or Python depending on user’s need but normally PHP is used.
So, we will now be installing LAMP server on Centos/RHEL 7 but same steps can be used for installing LAMP on Centos/RHEL 6 as well with change being that instead of MariaDB, MySQL will be installed.
Now let’s start with installation & configuration of LAMP server. For this tutorial, I am assuming that you have already installed Centos/RHEL 7, which is L part of LAMP & now we will proceed to installing Apache web-server.
NOTE:- Before we move on to install anything on server, make sure that your server has all packages updated. Run following command to update the packages, if not done already
$ yum update
Installing Apache
We will install Apache using yum,
$ yum install httpd
After apache has been installed, start the service
$ systemctl start httpd
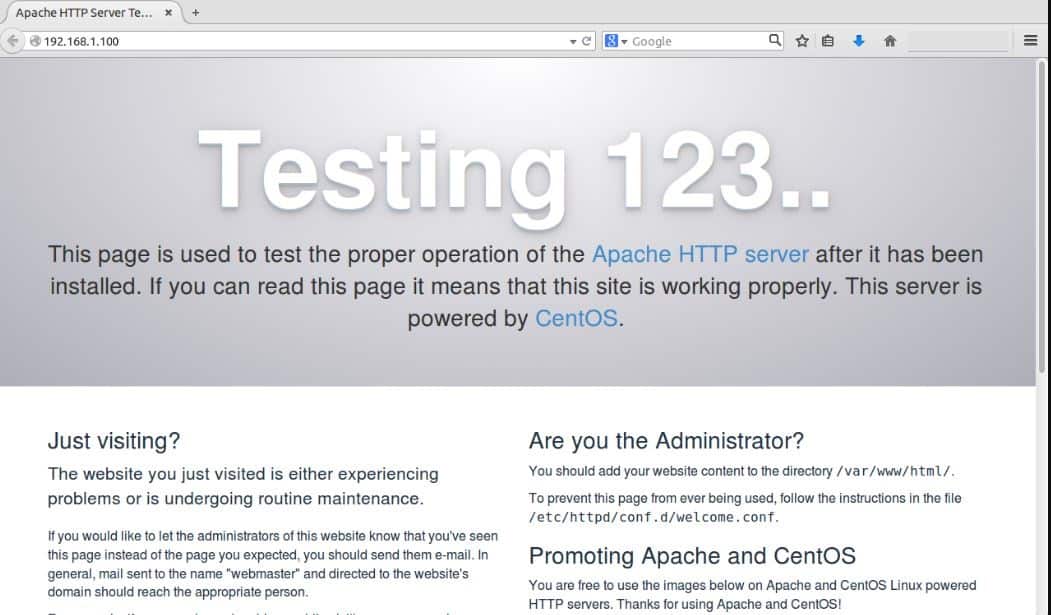
We will now test our apache server to see if its working properly or not. To check apache server, open your favourite web-browser & enter your server IP-Address
$ http://192.168.1.100
You will now see a default apache web-page,

Next, we will move on M part of LAMP, which is MariaDB,
Installing MariaDB
We will install MariaDB using yum only
$ yum install mariadb-server mariadb
Now, start server after its been installed
$ systemctl start mariadb
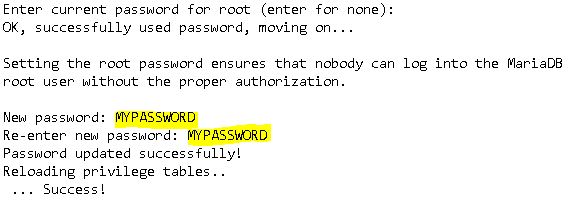
By default, root password is not setup in MariaDB. So we need to secure our database by assigning a password, which otherwise might turn out to be security threat & can led to unauthorized access. To secure our database, run the following command
$ mysql_secure_installation
You will now be asked to enter the password, since we just installed database it will be empty. So, just press enter & you will now be asked to if you want to set a root password, hit ‘Y’ & press enter.
Enter your desired password & confirm it. For the rest of the settings you can simply , hit ‘Y’ & press enter to use default values or change the values if you need to. But be sure of what you are changing.

Now, restart your database service to implement the changes.
$ systemctl restart maridb
Installing PHP
PHP (short Hypertex Preprocessor), is an open source scripting language which is widely for web-development . It runs scripts, connect to database to process the request for data.
PHP can be installed with yum only,
$ yum install php php-mysql php-gd php-pear
Now to test our PHP installation, we will create a file named test.php /var/www/html folder
$ vi /var/www/html/test.php
& add the following lines in it
<?php
phpinfo();
?>
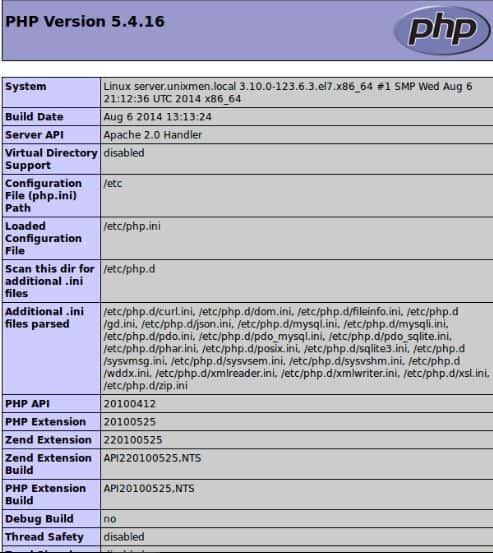
Restart apache server & then open web-browser. Now enter the following url
$ http://192.168.1.100/test.php
You should now see a page with all the details about php such as version, build date and commands etc. This just shows that our PHP is working as it should.

Sometimes, we might require some additional PHP-modules along with default ones for the website, so we need to install those modules as well. Firstly we will search all the PHP-modules using
$ yum search php-
It will display the list of available PHP-modules. You can search & select the required module among the list. You can also view the information about a module by using the following command
$ yum info module_name
& to install the module, use
$ yum install module_name
That’s it guys, our LAMP stack is now installed & properly configured. We can now use it to host our website or web-app. If having any queries/problems, please use comment box below.
If you think we have helped you or just want to support us, please consider these :-
Connect to us: Facebook | Twitter | Google Plus
Become a Supporter - Donate us some of you hard earned money: [paypal-donation]
Linux TechLab is thankful for your continued support.

Great guide, few small things:
1. I would enable the services not just start them, since we want it to hold after reboot
e.g. systemctl enable httpd
2. after the installation of php packages, the test didn’t work for me, I had to restart the httpd before it showed the test page.