In this tutorial, we will be discussing about Cpanel installation on Centos Machines. Cpanel is the best & most widely used Webhosting panel. Its so popular that almost all hosting companies, i have came across, uses it for hosting wordpress, joomla or other content management based websites.
Cpanel is a powerful control panel & with completely GUI based, with a single click we can perform tasks like scheduling a cron job, creating & managing email accounts, database administration etc. Cpanel can work either as a dedicated server or Virtual Private server & supports CentOS, RHEL & CloudLinux OS.
Cpanel also installs WHM along with the default installation, WHM allows administrative access to backend of the Cpanel servers. WHM can handle things like User management, Backup & restore, server monitoring etc with ease.
We will now start with Cpanel installation, but let's discuss some pre-requisites first,
(Recommended Read: CWS : Complete guide to install CentOS Web Panel)
Pre-requisites
1- It's recommended that we have a server with minimal setup. So a freshly created CentOS machine should be used.
2- We should have root account access for Cpanel installation,
3- Setup the FQDN for your server for Cpanel installation. To setup the hostname, run the following command,
# hostnamectl set-hostname cpanel.linuxtechlab.com
Also refer to our article on '5 ways to change hostname in CentOS & RHEL' for detailed instructions on changing the hostname.
Optional
This step is completely optional but recommended if you face internet issues. Since the installation of Cpanel takes time (around an hour) & also requires you download many files from internet, so loss of internet may cause the complete setup to fail. To address this issue, we can install 'screen' on the server.
Screen continues the installer, even if we loose connectivity. To install screen, run the following command,
# yum install screen
Once the installation finishes, we can start a screen session with the following command,
# screen Cpanel-install
Where Cpanel-install is the session name.
Cpanel Installation
Cpanel is based on PERL language & requires that we have perl installed on our machine for Cpanel. Install perl by running the following command on terminal,
# yum install perl
Cpanel provides a script for installation. Once perl has been installed on the system, we can now download & execute the script with the following command,
# curl -o latest -L https://securedownloads.cpanel.net/latest && sh latest

Now we wait, complete installation of Cpanel can take around an hour or even more than that, on regular internet speed.
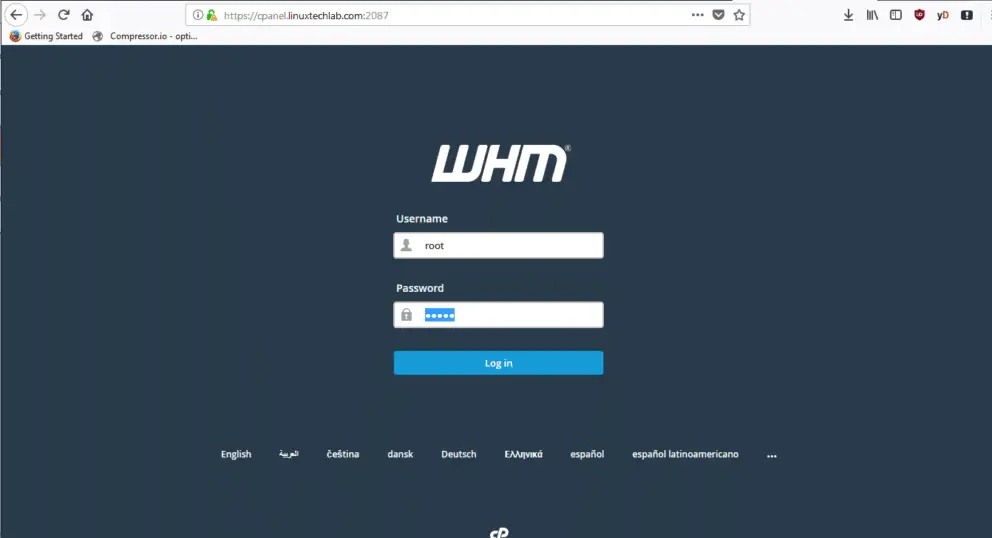
After the script is completed (took an hour for me), we will start configuring the Cpanel via our web browser. To access the Cpanel, enter the following URL in your web browser,
https://192.168.0.30:2087
Where 192.168.0.30 is server IP address for Cpanel, you might also need to add the URL as security exception on your browser to be able to access it. Now login to Cpanel with your system root account and password.

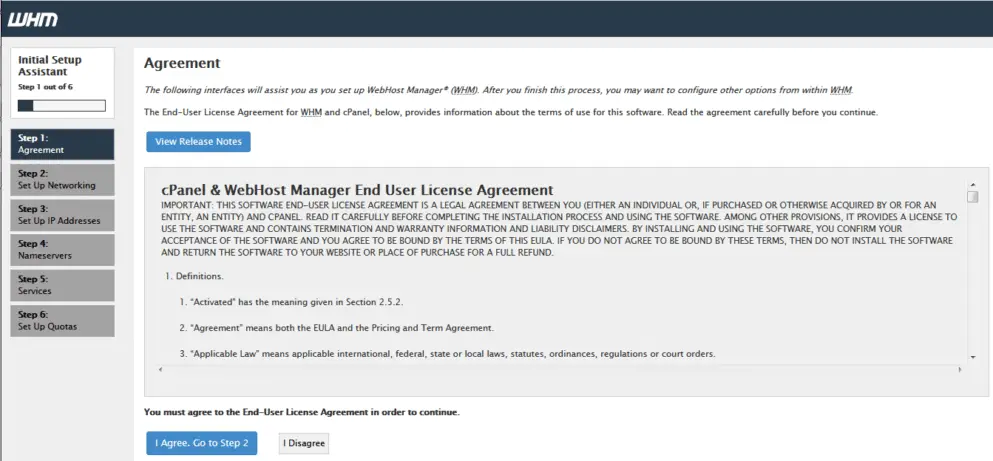
Now we will get the following screen,

Click on 'I Agree' to accept the Agreement & move to next screen. On this screen, you can change your hostname, DNS etc, make the necessary changes & click on 'Save' to move to next screen,

Here you can add more IP addresses, if you need. Once done click on ''Goto step 4' to process further,

On this screen, select the DNS server you wish to use & select the nameservers that you will use, than click on 'save',

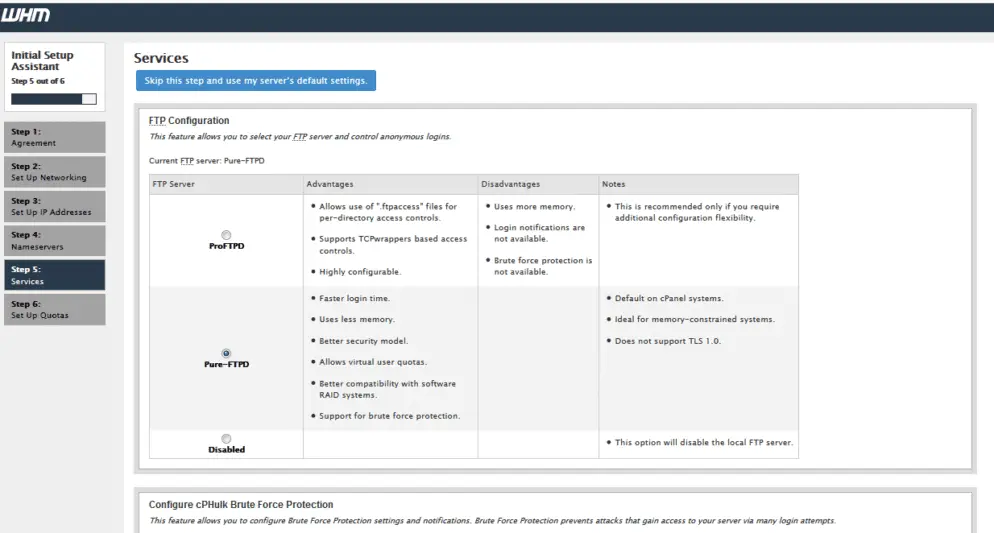
Configure the FTP & its related settings on this page & click on 'Save' to move to last step in Cpanel configuration,

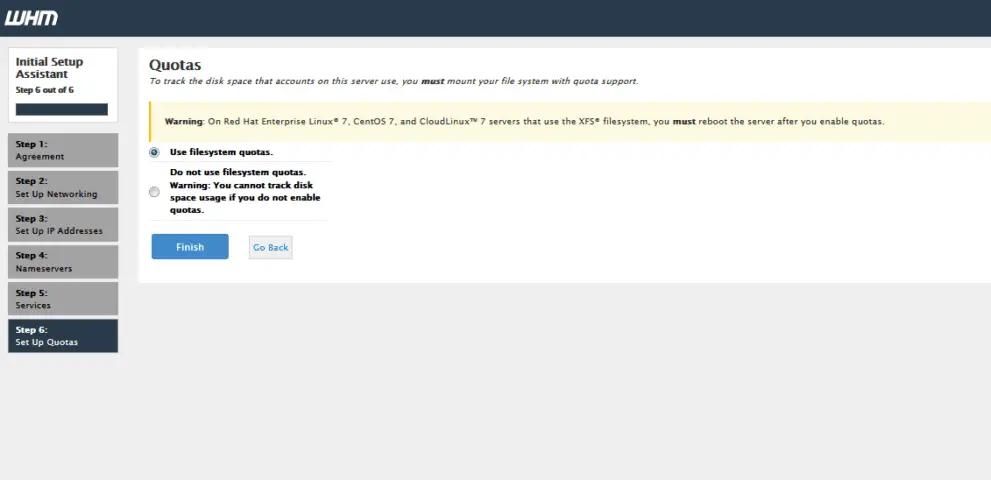
Now we have option to enable quota on our filesystem, which is recommended if you are using this in production & if you are only using it for testing, than you can leave it disabled.

Click on 'Finish' to complete the configuration for Cpanel. Once this is done, we will be redirected to 'Feature Showcase' page which showcases the new features added to Cpanel/WHM. Enable or disable them as per your need & click on 'Save settings' to proceed,

We will than be redirected to the main Cpanel page,

Cpanel installation on Centos & RHEL is now complete, we can now use it hosting the websites.
Note:- An uninstaller for Cpanel is not available & in order to uninstall Cpanel, we need to format the system. Though various guide on Cpanel uninstallation are available on internet but they have mixed responses & require a great amount on Linux expertise.
Please feel free to send in your queries or suggestions to us, using the comment box below.
If you think we have helped you or just want to support us, please consider these :-
Connect to us: Facebook | Twitter | Google Plus
Donate us some of you hard earned money: [paypal-donation]
Linux TechLab is thankful for your continued support.

My brother suggested I might like this blog. He was
entirely right. This post truly made my day.
You cann’t imagine just how much time I had spent
for this information! Thanks!