Postfix relay is the process by which we relay the mail from postfix to another mail server (AKA SmartHost) rather than using the local mail host. External mail server or SmartHost can be a privately owned mail server or can be any 3rd party mail service like Sendgrid, AWS, Rackspace mail, Gmail, etc.
But why would we need to do such a thing?
There can be plenty of reasons like you are running your mail server on dynamic IP addresses & those IPs can be blacklisted or your personal mail service might not have a good score & is being flagged as SPAM, so you take services from another provider with good SPAM score.
So irrespective of any reasons you have, in this tutorial we are going to learn to configure Postfix Relay for CentOS as well as Ubuntu machines.
Recommended Read: Mail Command: Send mail from the terminal on Linux machines
Also Read: Complete guide to install Zimbra Mail on CentOS & RHEL
Let’s start with the procedure for Ubuntu first,
Configuring Postfix-Relay on Ubuntu
We first need to install libsasl2-modules for our Ubuntu system, use the following command,
$ sudo apt-get update && sudo apt-get install libsasl2-modules
Next, we will install the Postfix,
$ sudo apt-get install postfix
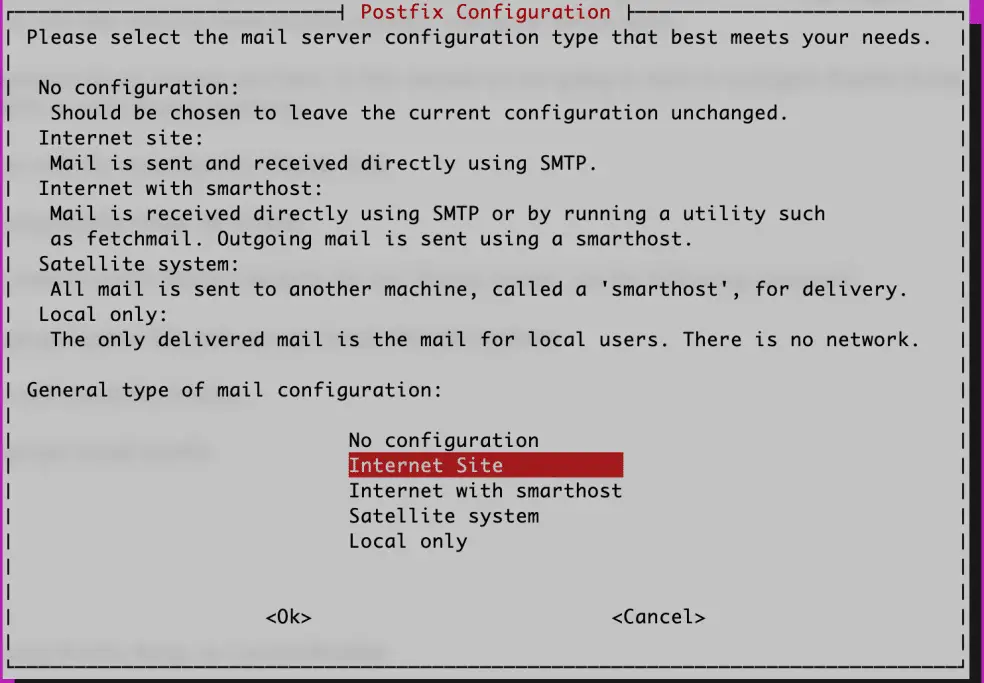
We will then be directed to the following screen, here select “Internet Site”

& on the next screen, we need to mention our mail host server (ours is mail.linuxtechlab.com),

Press ‘OK’, now the installation is complete.
Next, we need to make the entry for our credentials to access our Smarthost mail server, open the file ‘/etc/postfix/sasl_passwd’ & make the following changes,
$ sudo vim /etc/postfix/sasl_passwd
[mail.linuxtechlab.com] dan@linuxtechlab.com:Test@123
Here, you need to replace ‘dan’ with your user & instead of ‘Test@123’, you need to mention your password. Once done save the file & exit, now change the permissions to ‘640’ for the file,
$ chmod 640 /etc/postfix/sasl_passwd
Now create the database file for postfix with the command,
$ sudo postmap /etc/postfix/sasl_passwd
This command will create a file ‘sasl_passwd.db’ in the same folder i.e. /etc/postfix. Now restart the postfix server to implement the changes made,
$ sudo systemctl restart postfix
$ sudo systemctl enable postfix
We now have our Postfix relay ready to use. In the next section, we will discuss the configuration for CentOS & RedHat OS.
Configuring Postfix-Relay on CentOs/RedHat
Though these steps are executed on a CentOS machine, the procedure is the same for RedHat also. We will start by installing the postfix & requires packages. Run the following command for installing the same,
$ sudo yum install cyrus-sasl-plain postfix
Next, start the service & enable it for boot time,
$ systemctl start postfix
$ systemctl enable postfix
Note:- Some CentOS versions have Sendmail installed by default, please remove it before installing the postfix package. To remove sendmail run the following command,
$ yum remove sendmail
Next, we will configure the postfix for making it a postfix relay. Unlike Ubuntu, where we can make configure internet site during installation only, here we need to edit a config file. Open the following file & make changes as highlighted below,
$ sudo vim /etc/postfix/main.cf
relayhost = [mail.linuxtechlab.com]:587
smtp_sasl_password_maps = hash:/etc/postfix/sasl_passwd
that’s it, we only need to make changes to these two things. Now save the file & exit, next edit the file ‘/etc/postfix/sasl_passwd’, & make the following changes,
$ sudo vim /etc/postfix/sasl_passwd
[mail.linuxtechlab.com]:587 dan@linuxtechlab.com:Test@123
Here, you need to replace ‘dan’ with your user & instead of ‘Test@123’, you need to mention your password. Change permissions for file as we did above,
$ chmod 640 /etc/postfix/sasl_passwd
Next, create the database file,
$ postmap /etc/postfix/sasl_passwd
Now restart the postfix server to implement the changes made,
$ sudo systemctl restart postfix
Your postfix relay is now ready to use. With this we end our tutorial on how we can set up a postfix relay, please do send us any questions or queries you have regarding this & we will be more than happy to address them.
If you think we have helped you or just want to support us, please consider these:-
Connect to us: Facebook | Twitter | Google Plus
Donate us some of your hard earned money: [paypal-donation]
Linux TechLab is thankful for your continued support.
