Hello Linux-fanatics, in our earlier tutorial we learned to create apache web server with Name based hosting & IP based hosting. If you have not read it, read it now because we will need a working apache web-server for this tutorial. In this tutorial, we are going to learn to secure our website with a SSL certificate.
What is SSl certificate & why do we need it ?
SSL certificate
SSL or Secure Socket Layer is web protocol, which is used to encrypt our web-server traffic. Data transfer during website access is in plain text which can easily be hacked. This might not seem like a threat when we are reading tutorials on Linuxtechlab.com but it will be a major issue when you are shopping at amazon & someone hacks your credit card info. So in order to prevent any eavesdropping/hacking , we secure our websites with a SSL certificate. If our website has a SSL cert & someone hacks the data, it will be of no use to him since it will be encrypted.
If you have a website that is accessed globally, we need to get an SSL certificate from a Global certificate authorities (CAs) as self-signed certificates, which we will be creating, are not identified by web-browsers. Self-signed certificates are signed by the same person as the person creating & are good for internal & testing purposes.
Now let’s create SSL Certificate (self-signed certificate),
(Recommended Read: Installing Awstat for analyzing Apache logs)
(Also Read: How to use Apache reverse proxy as Load Balancer)
Pre-requisite
Firstly, we will need a working apache web-server with a website of at least a single page hosted,
Secondly, we will need the ‘mod_ssl’ & ‘openssl’ installed on our web-server. We can install them by using YUM
$ yum install mod_ssl openssl
Create SSL Certificate
We will now generate the certificate using the following steps, but first let’s create a folder where we will be doing our certificate generation
$ mkdir /etc/httpd/ssl
$ cd /etc/httpd/ssl
Now, we can create a self-signed key and certificate pair with OpenSSL in a single command by typing
$ openssl req -x509 -nodes -days 365 -newkey rsa:2048 -keyout /etc/httpd/ssl/apache.key -out /etc/httpd/ssl/apache.crt
here, openssl is the command for creating and managing ssl,
req –x509 is public key infrastructure for ssl,
-nodes, means we don’t need a passphrase,
-days 365 is the validity of the certificate,
-newkey rsa:2048 means cert will 2048 bit long,
-keyout, means where to place Private key,
-out means where to place our certificate.
Once you run this command you will asked to provide some information , provide the information & your certificate will be created.

Adding Certificate to Web Server
After generating the certificate, we need to add in to our apache server. Open ‘/etc/httpd/conf.d/ssl.conf’ & we will make some changes to it
$ vi/etc/httpd/conf.d/ssl.conf
Now search for the line with ‘VirtualHost _default_:443’ & change the server name to one you used as common name on your ssl certificate (test1.com), so it look like
<VirtualHost _default_:443>
. . .
DocumentRoot "/var/www/html"
ServerNamewww.test.com:443
Next we will add the path to our certificate & Private Key,
SSLEngine on
SSLCertificateFile /etc/httpd/ssl/apache.crt
SSLCertificateKeyFile /etc/httpd/ssl/apache.key
After making these changes, save & exit the file. Restart your apache service
$ systemctl restart httpd
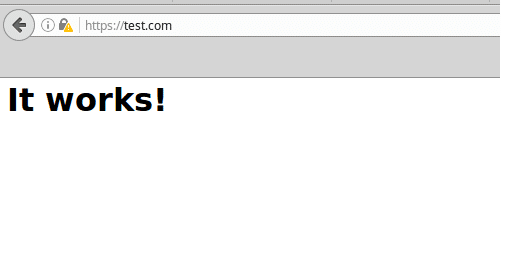
& now open your web browser & try accessing your website using https,
https://www.test.com

Voila, its works, this completes our tutorial on how to create SSL Certificate for Apache server. Please feel free to mention any queries/comments in the comment box down below.
If you think we have helped you or just want to support us, please consider these :-
Connect to us: Facebook | Twitter | Google Plus
Become a Supporter - Donate us some of you hard earned money: [paypal-donation]
Linux TechLab is thankful for your continued support.

When I click on yellow warning sign, I see that “Connection Is Not Secure”. what does it mean? please…
you might not have not installed the certificate properly or you might mixed content warning. But in case of self signed certificate it will be there.