In this tutorial, we will discuss how to use Terraform for GCP. We will take an example by creating a VPC using Terraform for GCP/Google cloud. This tutorial will demonstrate the complete steps involved in creating the VPC. So let’s start by discussing the prerequisites first.
Also Read: Importance TERRAFORM commands that we should know
Prerequisites
1- We need to have Terraform installed on our system, so please read through the article here to install terraform on Linux systems.
2- We also required Google cloud SDK to be installed on our system, so read this article to install Google Cloud SDK on your Linux systems.
Now let’s start the steps to create VPC using Terraform for GCP one by one.
Step 1 - Create a new project in Google cloud
Login to the Google Cloud console to create a new project for this example. You can also use existing projects but since it’s only an example to demonstrate the use of terraform for Google cloud / GCP, I will be using a new project.
On the GCP dashboard, click on ‘CREATE PROJECT’,

Next, mention a new project & click on create,
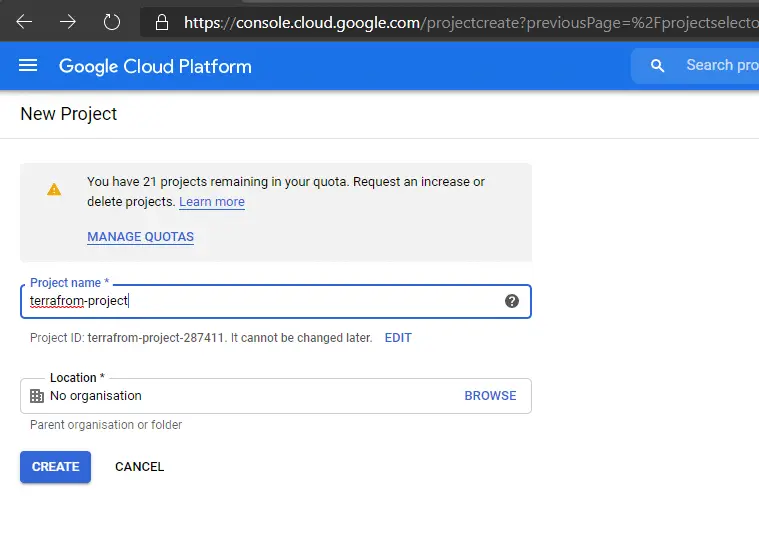
Once the project is created, make sure that the project is selected & we can then proceed to the next step.
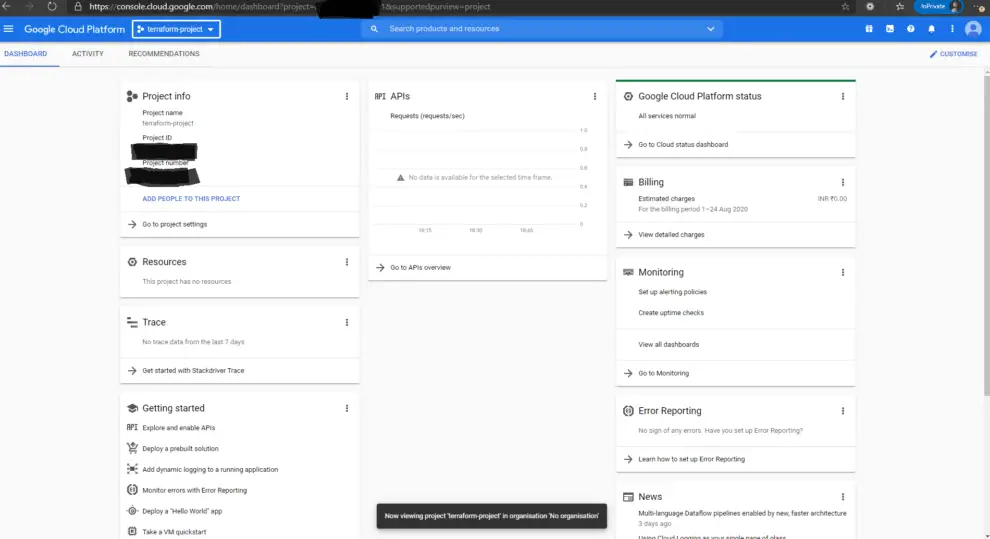
We also need the project id, which we need to use in the terraform script. It can be found under the ‘Project Info’ as shown in the screenshot above.
Step 2 - Create a new service account
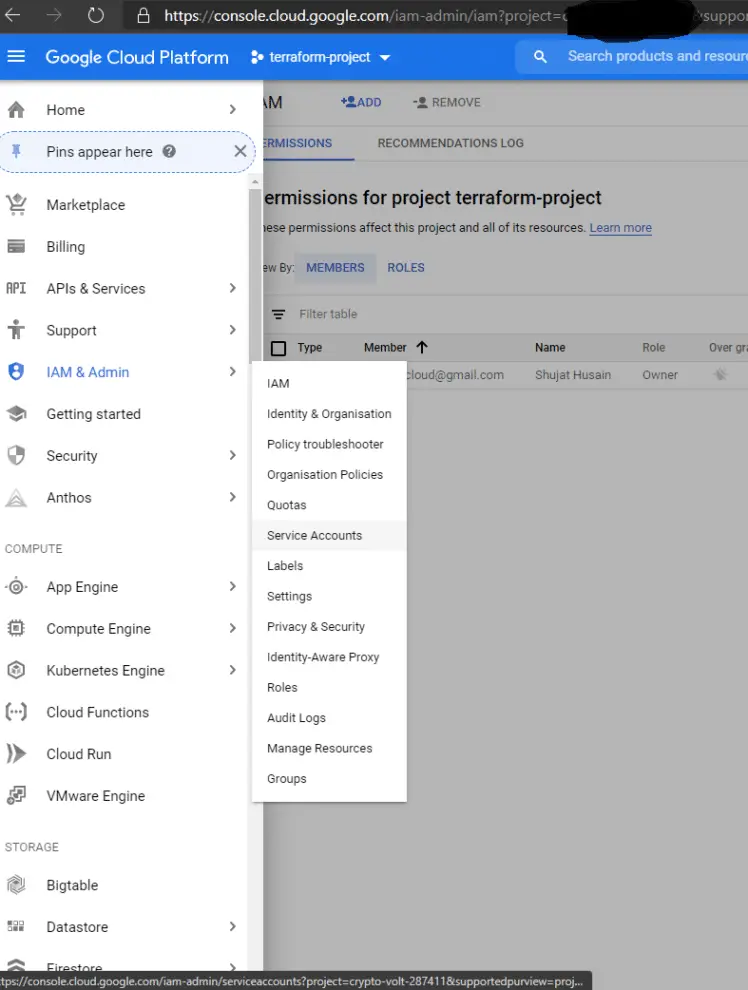
We need to now create a new service account to be used with terraform, so goto ‘IAM & Admin’ section & click on ‘Service Accounts’,
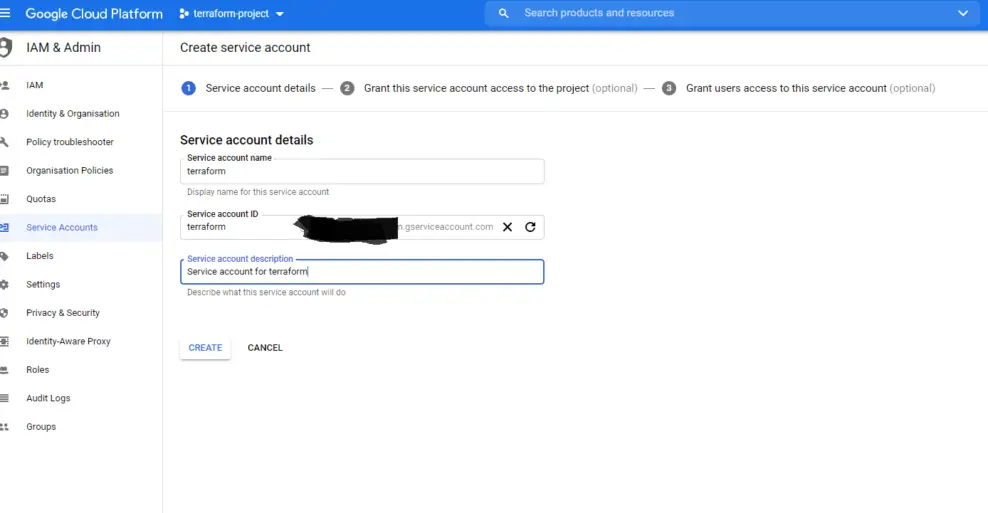
Now mention a name for the service account & also mention description & click on create,
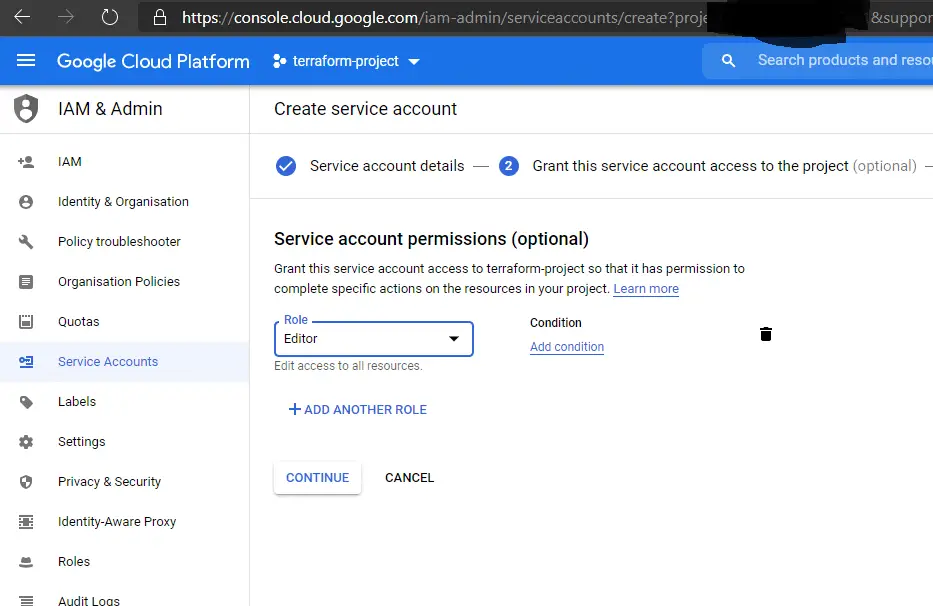
Next, provide the ‘Service Account Permissions’ as ‘Editor’ & click ‘Continue’,
Now, provide your Gmail id to grant access to the service account & click on ’Done’,

Step 3 - Create a key for the Service account
We are required to use a key to authenticate the configuration made using the terraform scripts. For that we need to create a key for the service account we create, the key should be in JSON format.
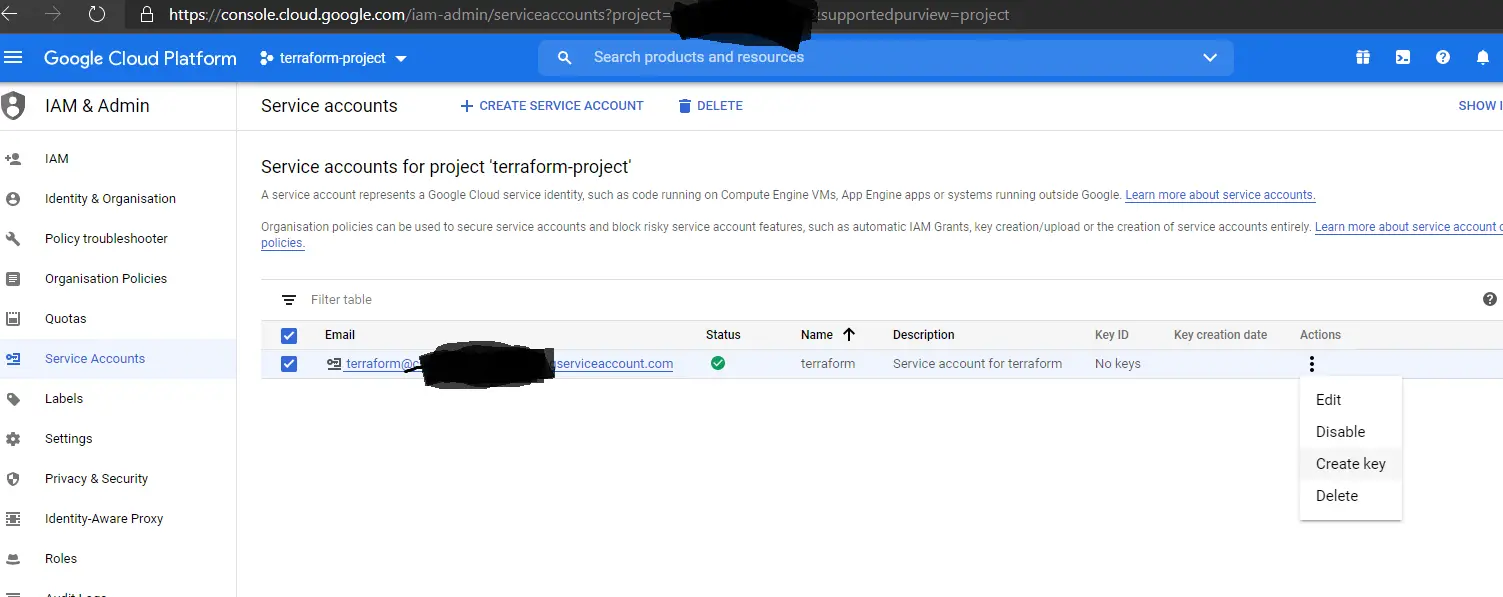
To create the key, click on the settings (3 dots at the last of line) for service account & click on ‘Create Key’,
& select the file format as ‘JSON’ & click ‘Create’,
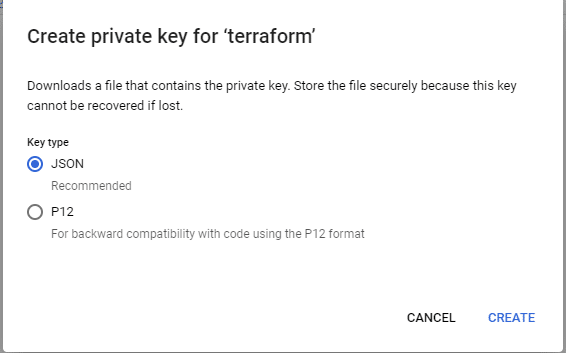
NOTE - We need to copy this file to the system where we will run the terraform script.
Step 4 - Enable the Google Cloud APIs
Next, we need to enable some APIs for terraform on the Google Cloud console. We are required to enable the following APIs,
- Cloud Resource Manager API
- Cloud Compute Engine API
- Cloud Storage API
If you are working under another organization, then you also need to enable the following 2 APIs,
- Cloud IAM API
- Cloud Billing API
Now, to enable an API, Click on ‘API & Services’, ‘Dashboard’ from the GCP services.
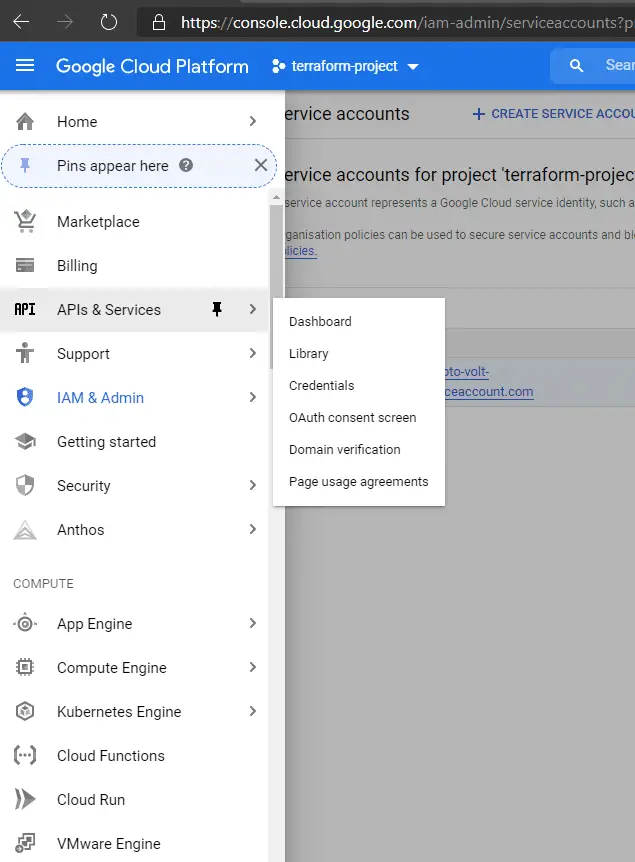
& then click on ‘Enable API & Services’

In the search bar, type the API required to be enabled. In our case, we are looking for ‘Cloud Compute Manager’,

Once the page for the API opens, create on ‘Enable’ to enable that API,
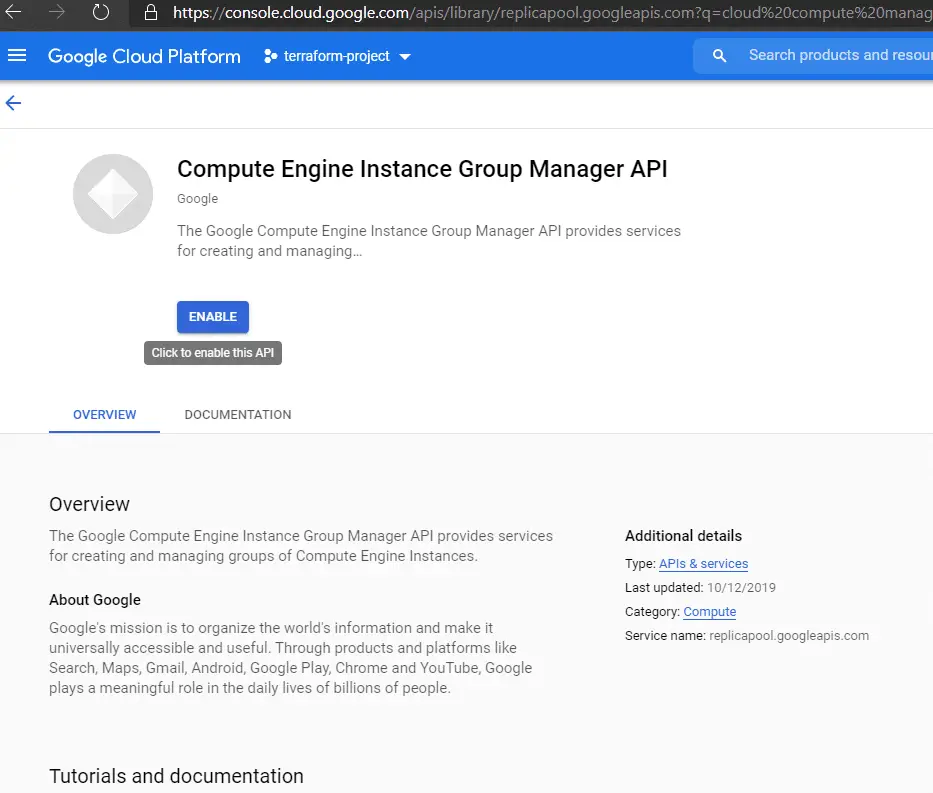
Similarly, enable the other mentioned APIs as well.
Step 5 - Create the Terraform configuration file, main.tf
We will now create the configuration file for terraform or terraform script, it’s named ‘’main.tf. Keep the file the file, the JSON key created in the same folder.
Now create the file & enter the following content on the file,
$ vim main.tf
provider “google” {
credentials = file(“service_account_key.json”)
project = “project_id_here”
region = “us-centrai1”
zone = “us-central1-a”
}
resource “google-compute_network” “vpc_network” {
name = “test_terraform_vpc”
}
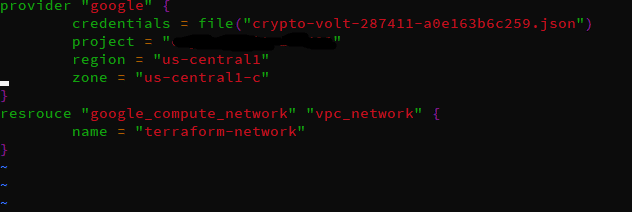
Save the file & exit.
Step 6 - Initialize the script
We will now the following command,
$ terraform init
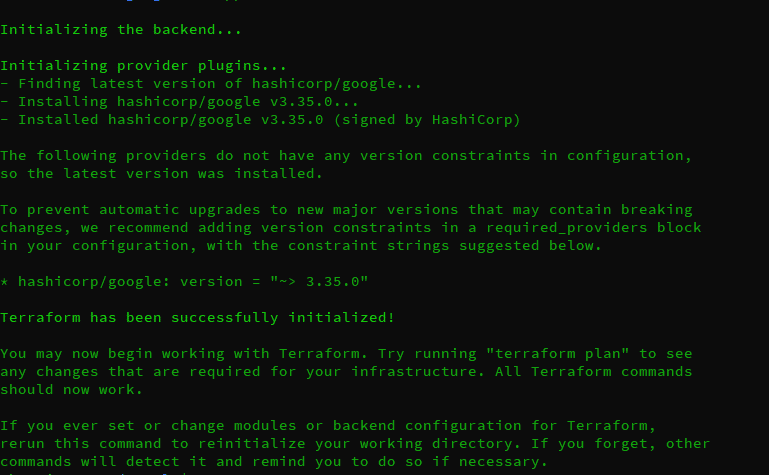
This will initialize the configuration file & fetch the modules/plugins required to execute the script. Make sure to run this command in the directory with the configuration file.
Step 7 - Create the execution plan
The next step would be to run the following command,
$ terraform plan
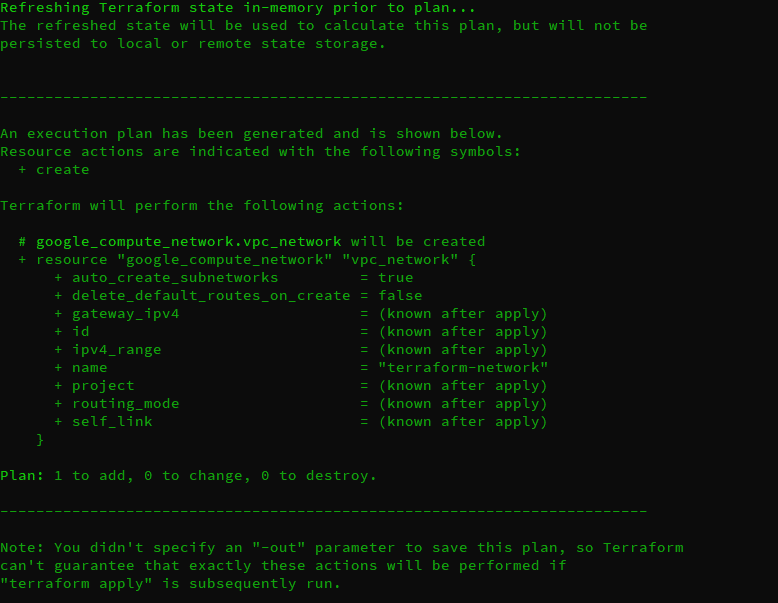
This step will create an action plan for the changes that will be made once the script will run. You can review the action items here & make sure that all things are in order.
Step 8 - Apply the script changes
We need to next run the following command,
$ terraform apply
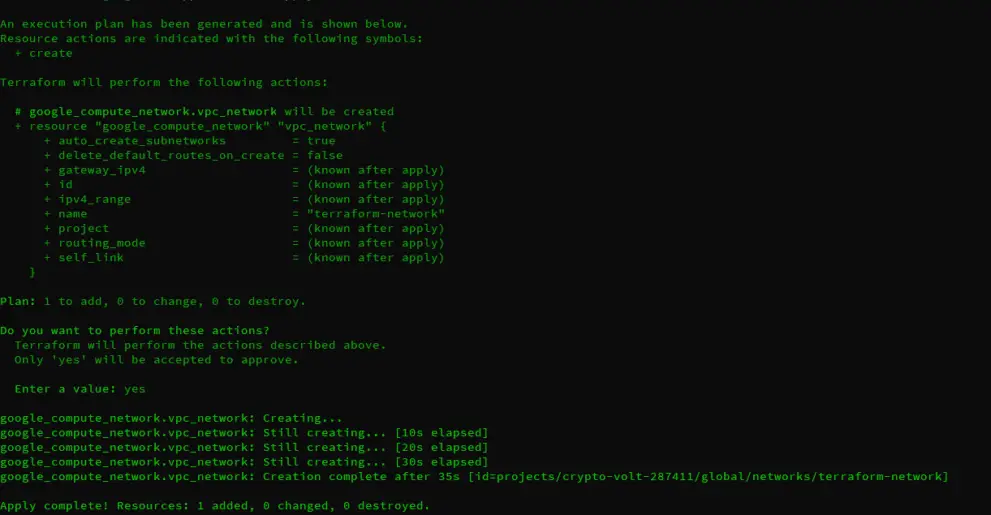
This command will complete the actions as mentioned in the terraform script & will then create the VPC on the google cloud.
Step 9 - Check the VPC
We can now head over to the Google cloud console & can check the newly created VPC by selecting the ‘VPC Network’ from the list of Cloud Services.
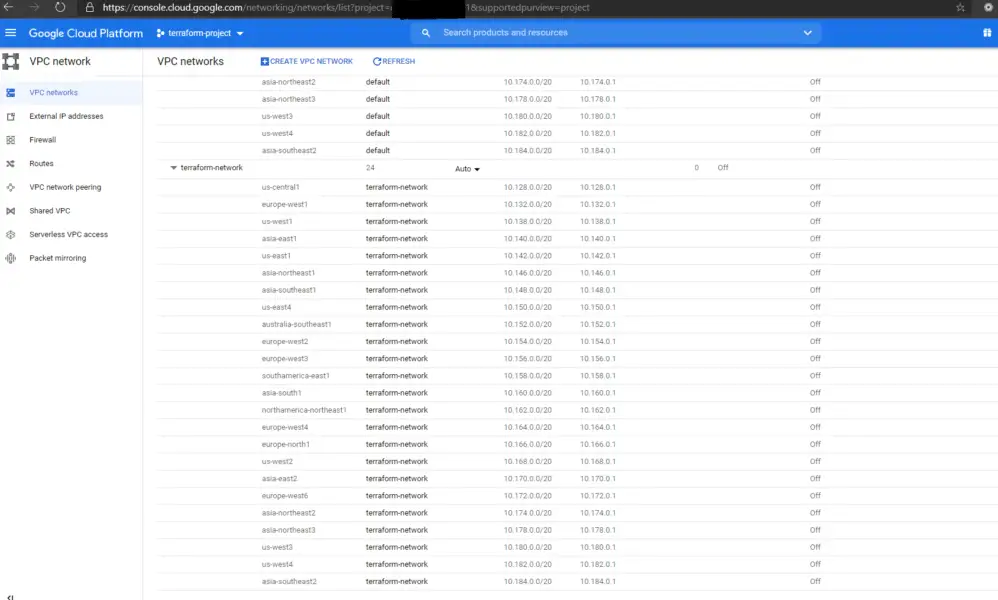
This completes our tutorial on how to use Terraform for Google Cloud (GCP) to create a VPC. Please do let us know if you have any questions or queries using the comment box below.
