Recently we have started using an awesome solution to backup our Linux files and folders to Amazon S3 called Cloudberry Backup. CloudBerry Backup allows to perform backups of all Linux systems and available for Ubuntu, Debian, Fedora, Suse, Red Hat, CentOS. Not only for Linux, it is also available for Windows & macOS as well.
With CloudBerry Backup, we can back up our data to Amazon S3, Google Cloud , Azure as well as other available cloud storage solutions. CloudBerry supports the direct transfer of data from source to destination without processing the data on 3rd party servers, making data much secure & less susceptible to intrusion. We can also check the consistency of our backups to ensure proper recovery at any point in time.
It supports incremental backups i.e. we can use it to backup modified files & we can also backup network locations like NAS, mapped drives etc with it. As for restoration, we can restore data on the same or different machine, we can schedule the restore operation at any time we want, we can select the point in time to restore and CloudBerry Backup can also restore the symbolic links of our Linux systems.
There are two versions available for us to use:
Freeware version — Available for personal use & comes with most features available in PRO version like flexible scheduler, retention policies, schedules backups, incremental backups, block level backups, email notifications, local backup, network location backups, symlinks support, CLI & Web interfaces. With Freeware version, we can manage data volumes up to 200 GB.
PRO version — Apart from the features available mentioned with Freeware version, with PRO version we also get 256-bit AES encryption & compression. Also, we can manage backup of data volumes of up to 5 TB opposed to 200 GB limit of Freeware version. Cost of PRO version is $29.99.
In this tutorial, we are going to discuss how we can use CloudBerry Backup to backup data from Linux system to Amazon S3. So let’s start with pre-requisites.
Pre-Requisites
1- Linux system, we will be using the Ubuntu operating system for this tutorial,
2- AWS S3 bucket with its Access key ID & AWS secret Access key.
Now let’s discuss the installation of CloudBerry Backup.
( Recommended read: Easy & simple guide to Backup & Restore GITLAB )
( Also Read: Scheduling important jobs with CRONTAB : Crontab Examples )
Installation
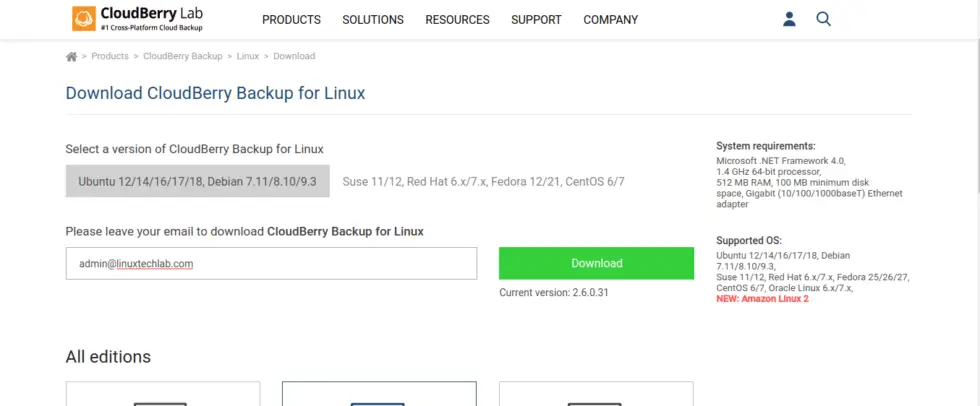
Firstly we need to get the package for CloudBerry to install it to our Linux machine. As mentioned above we are using the Ubuntu operating system for this tutorial, so we will need to download .deb package. To download the package we go to CloudBerry official page .
On this page, select the package you need to provide your Email address and click on download,
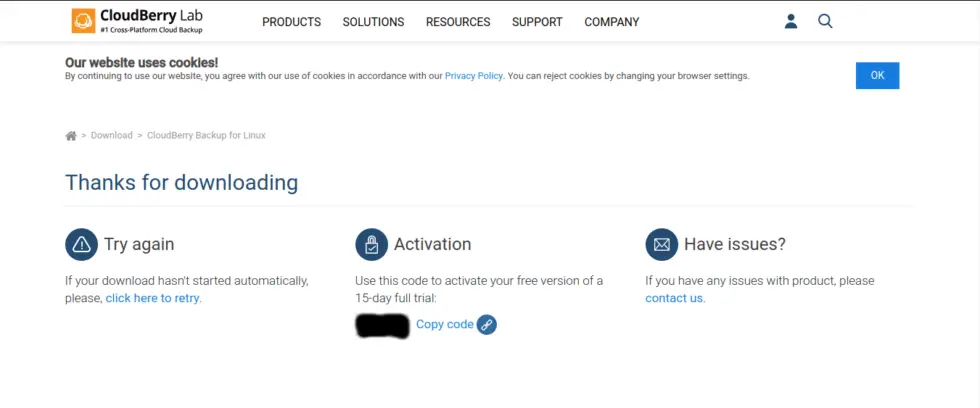
Now download will start and we will be redirected to the next page, here you will be shown a code for a 15 day trial of PRO version. So if you want to test out PRO version before you purchase it, you will need this code, copy and keep it safe as it will be needed later.
After download has been completed, open terminal and install the package with the following command.
$ sudo dpkg -i ubuntu14_CloudBerryLab_CloudBerryBackup_v2.6.0.31_20180920191821_c476346.deb
Note - If you are using other Linux OS apart from Ubuntu/Debian, we need to only make changes to above-mentioned command depending on the package and package manager used to install the package, rest of the tutorial should be same.
Configuration
Now CloudBerry Backup has been installed, we can start it from the menu. Look for ‘CloudBerry Backup’ in the system menu. Click on it to start, once started we should see the following screen:
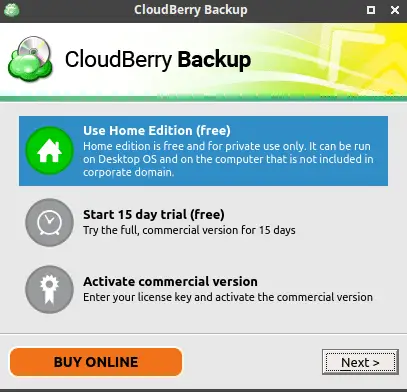
Here you can select the Trial and then use the code that we got while downloading. For now, we are using Home Edition (Freeware) for this tutorial, click next to proceed. Now enter a new username as well your email address and click on ‘Get registration key’ to get a freeware registration key on your email address.
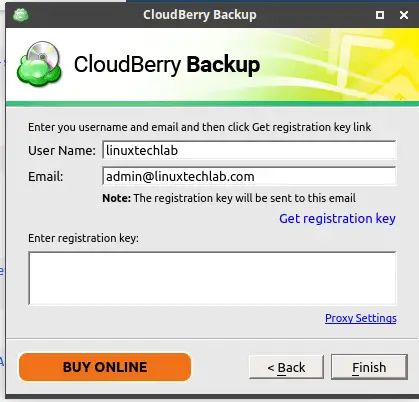
Copy the key from mail and paste in the ‘Enter registration key’ section and press ‘Finish’. Now we can start using CloudBerry Backup.
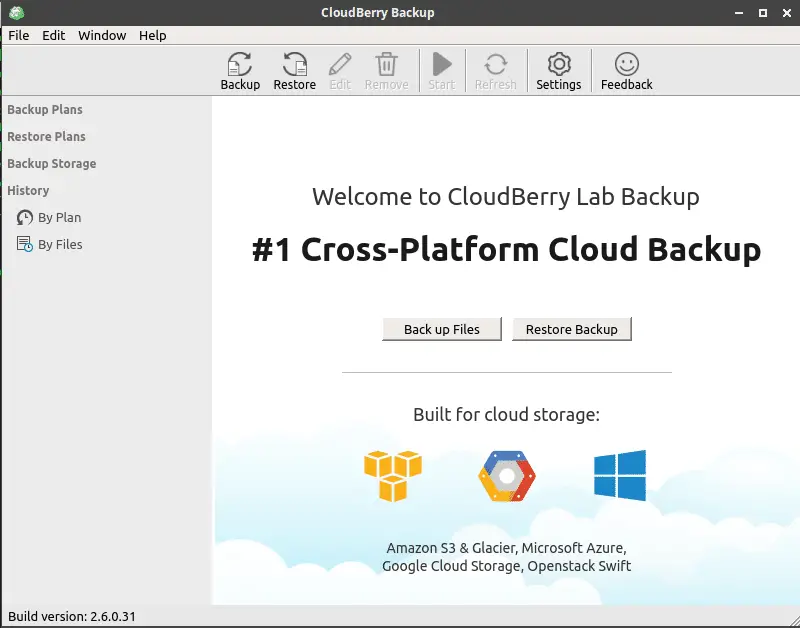
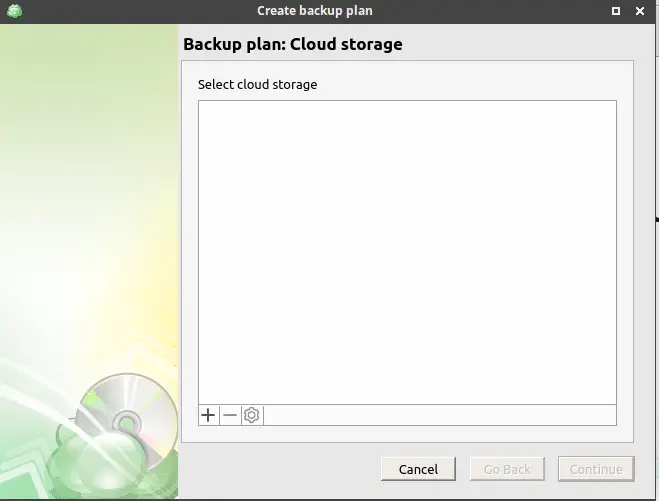
Now click on ‘Backup Files’ and on the next screen click on ‘+’ to add a new storage account. Alternatively, you can also add a new storage account by going into ‘Settings’ & selecting storage.
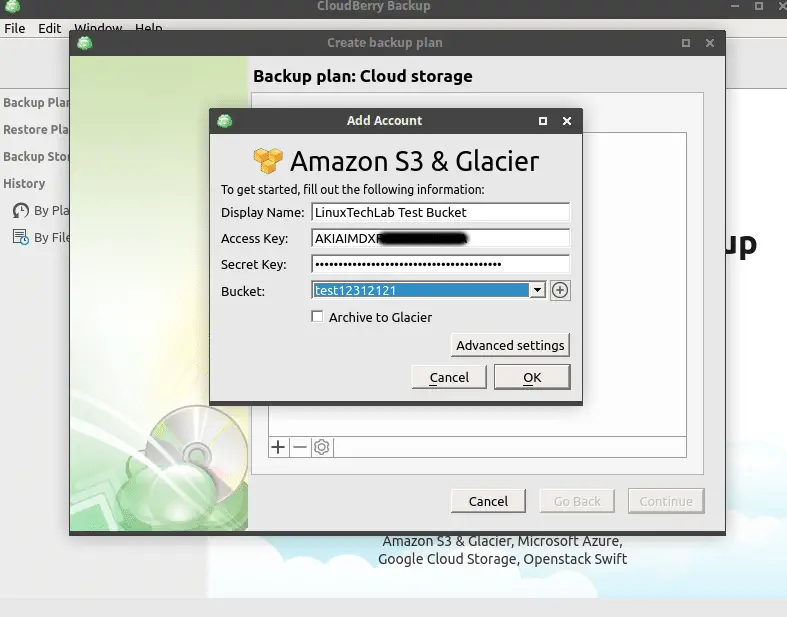
Since we will be using Amazon S3 enter the Access Key, Secret key and upon successful authentication you will be able to select the desired bucket from drop-down menu. Press ‘OK’ to continue.
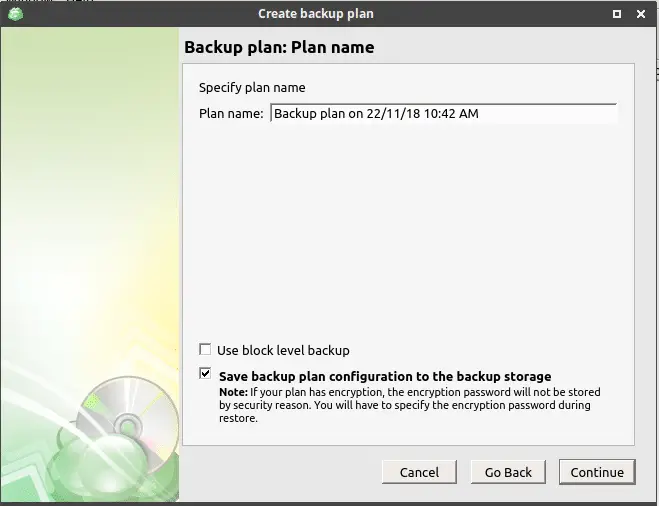
Now our added storage will be shown as the backup location on the next screen, select it and press ‘Continue’. We will be asked to enter a backup plan name. Mention one or leave it as default then press ‘Continue’.
Now we will be asked to select the folder for which backup is done, select all folders/files for which backup needs to be done. Press ‘Continue’, on the next step we can also make some advanced changes to files or folders that we have selected for backup.
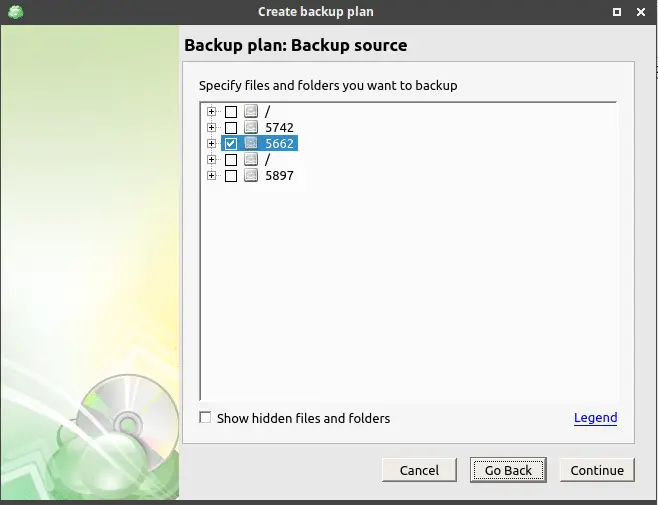
Next, we can select the type of Amazon S3 storage, compression & encryption. Once done, press ‘Continue’.
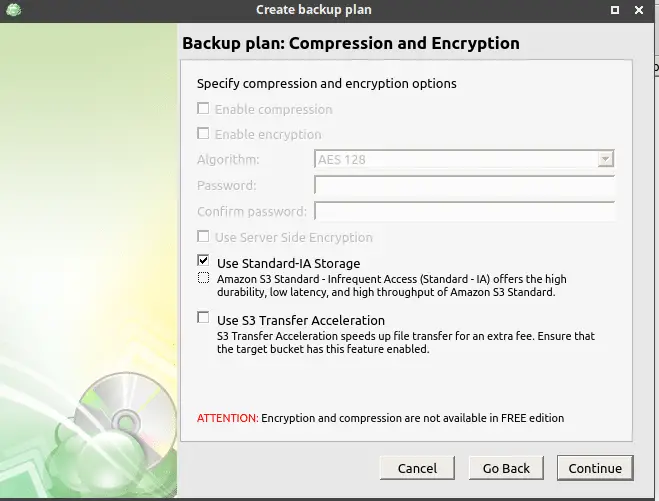
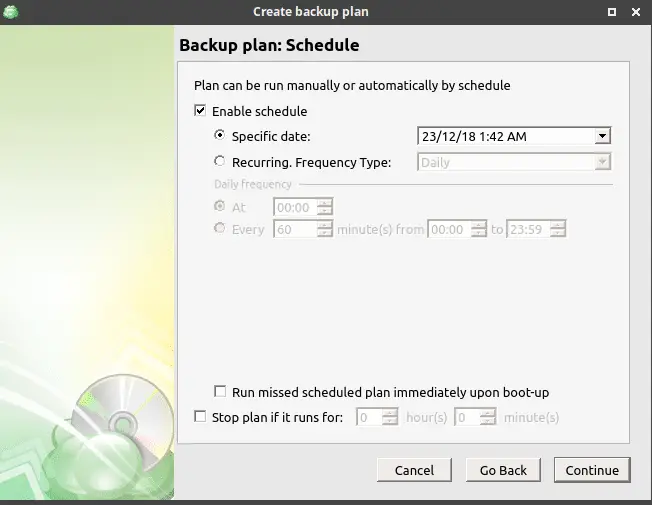
On the next screen, we can define the retention policy for our backup, select one and then move onto the next step. Here we can select a schedule for backup, depending on our requirement we can select backup for the specific date or a recurring daily, weekly or a monthly backup.
Now on the next screen, we can configure an email address for receiving notifications about the backups.
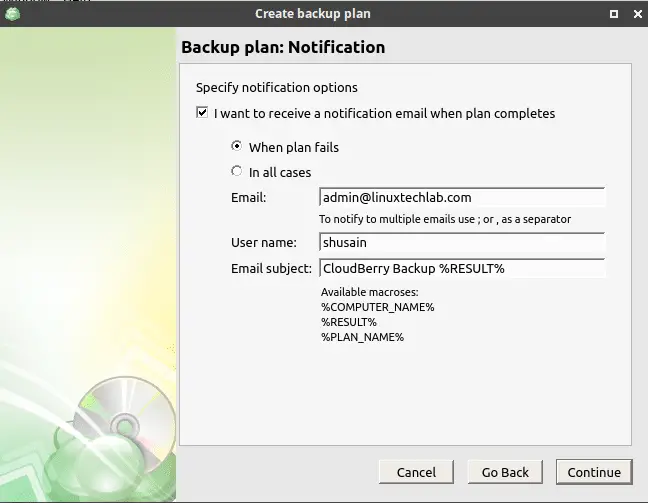
Once you press ‘Continue’ a confirmation mail will be sent to your email address and you must then confirm your registration, otherwise notification emails will not be sent to you, On the last screen, you will get summary of all the configurations made, review those and press ‘Done’ to complete the configuration.
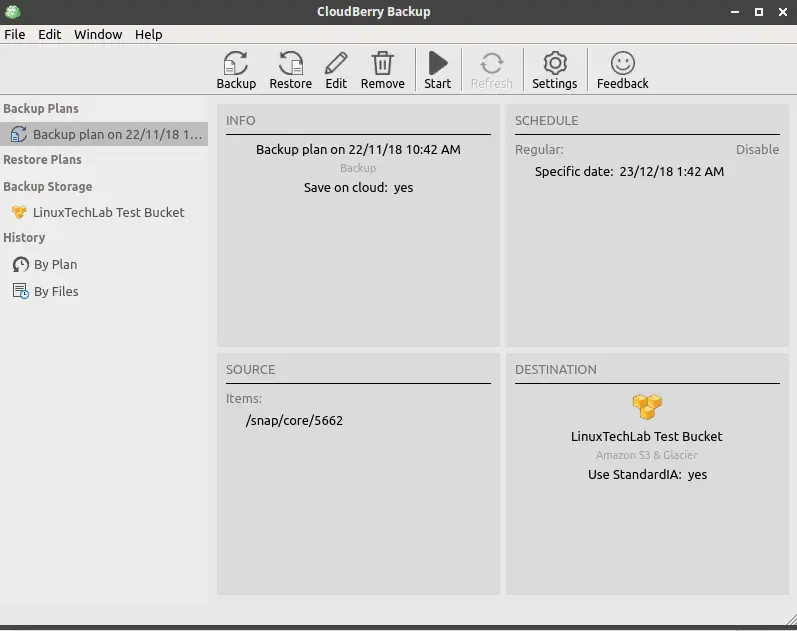
Similarly, you can create as many backup plans as needed and once you have created the plans, these can be found under ‘Backup Plans’ on the main screen of CloudBerry Backup. You can then select a plan and can edit it, delete it or run it.
That’s it, hope you enjoyed our tutorial on this awesome solution called CloudBerry Backup, and now you know how to back up data from Linux system to Amazon S3 with CloudBerry Backup.
If you think we have helped you or just want to support us, please consider these :-
Connect to us: Facebook | Twitter | Google Plus
Donate us some of your hard earned money: [paypal-donation]
Linux TechLab is thankful for your continued support.
