
In this article, we will learn about how to enable 2-factor authentication or multi-factor authentication (2FA / MFA) on the Gitlab server. MFA allows us to secure our Gitlab account by adding another layer of security.
Here is how to enable 2FA or MFA on Gilable server.
Enabling 2 FA for Gitlab
Login to your GitLab Accounts & access your 'User settings'. Select account & select 'Enable Two-factor Authentication'. The following screen will be displayed,
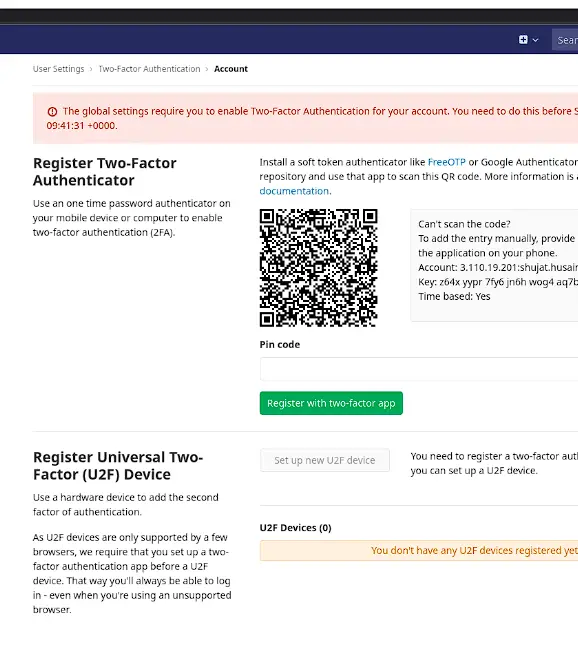
To complete this step, you are required to install the AUTHY app, either on your mobile devices or your Laptops/Desktop).
If you are using the mobile app, then you can simply scan the bar code after opening the Authy App or if you are using Authy on your Laptop or Desktop, you need to copy the following highlighted text,

and paste it into the Authy app (there is a + icon on the Top Right corner in the app),
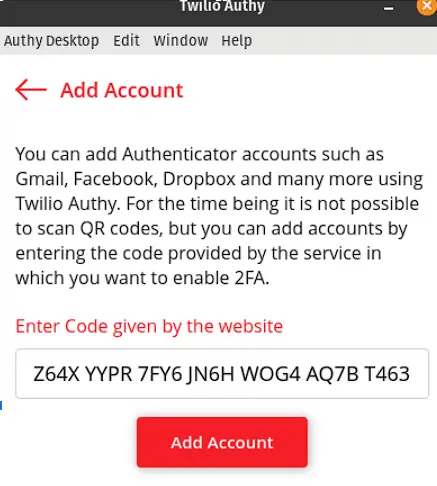
Next select ‘Add Account’ and enter an Account Name as well as a logo & hit Save. You will now be shown a 6 digit code, copy it,
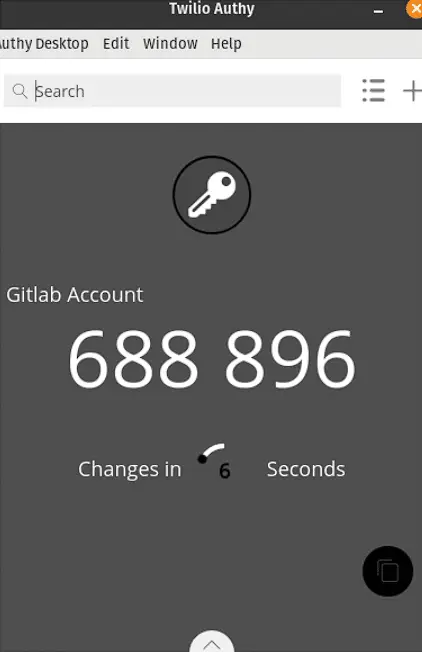
And you are required to enter in the GitLab website,

Then click on ‘Register with Two Factor App’, next click on ‘Proceed’. That’s it, you have successfully enabled 2FA for your account. To test it, you need to logout of the current session of Gitlab.
Try logging back in, after your initial ‘User Name & Password authentication, you will now be redirected to a new screen asking for Two Factor Authentication,

Open Authy App & select your Gitlab account, copy the code being displayed to the above screen & click on ‘Verify Code’.
After successful authentication, you would than be redirected to your Gitlab Account Dashboard.
We are giving you exclusive deals to try Linux Servers for free with 100$ credit, check these links to claim your 100$,
DigitalOcean - 100$ free credit & Linode - 100$ free credit
Check some Exclusive Deals, HERE.
Also, check out DevOps Book You should read section.