In this tutorial, we will learn to install the VNC server & secure VNC server sessions with TLS encryption.
This method has been tested on CentOS 6 & 7 but should work on other versions/OS as well (RHEL, Scientific Linux, etc).
(Recommended Read: Ultimate guide for Securing SSH sessions )
Installing VNC server
Before we install the VNC server on our machines, make sure we have a working GUI. If GUI is not installed on our machine, we can install it by executing the following command,
# yum groupinstall “GNOME Desktop”
Now we will tigervnc as our VNC server, to install it run,
# yum install tigervnc-server
Once VNC server has been installed, we will create a new user to access the server,
# useradd vncuser
& assign it a password for accessing VNC by using the following command,
# vncpasswd vncuser
Now we have a little change in configuration on CentOS 6 & 7, we will first address the CentOS 6 configuration,
CentOS 6
Now we need to edit VNC configuration file,
# vim /etc/sysconfig/vncservers
& add the following lines,
[...]
VNCSERVERS="1:vncuser"
VNCSERVERARGS[1]="-geometry 1024x768"
Save the file & exit. Next, restart the VNC service to implement the changes,
# service vncserver restart
& enable it at boot,
# chkconfig vncserver on
CentOS 7
On CentOS 7, /etc/sysconfig/vncservers file has been changed to /lib/systemd/system/vncserver@.service. We will use this configuration file as the reference, so create a copy of the file,
# cp /lib/systemd/system/vncserver@.service /etc/systemd/system/vncserver@:1.service
Next, we will edit the file to include our created user,
# vim /etc/systemd/system/vncserver@:1.service
& edit the user on the following 2 lines,
ExecStart=/sbin/runuser -l vncuser -c "/usr/bin/vncserver %i"
PIDFile=/home/vncuser/.vnc/%H%i.pid
Save file & exit. Next, restart the service & enable it at boot,
# systemctl restart vncserver@:1.service
# systemctl enable vncserver@:1.service
We now have our VNC server ready & can connect to it from a client machine using the IP address of VNC server. But we before we do that, we will secure our connections with TLS encryption.
Securing the VNC session
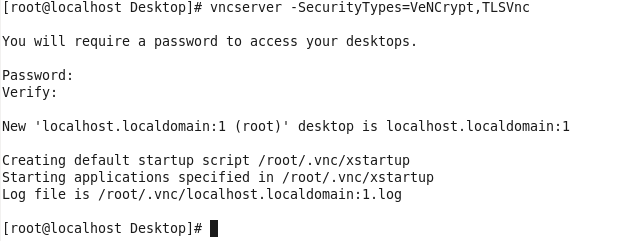
To secure VNC server session, we will first configure the encryption method to secure VNC server sessions. We will be using TLS encryption but can also use SSL encryption. Execute the following command to start using TLS encryption on the VNC server,
# vncserver -SecurityTypes=VeNCrypt,TLSVnc
You will be asked to enter a password to access VNC (if using any other user, then the above-mentioned user)

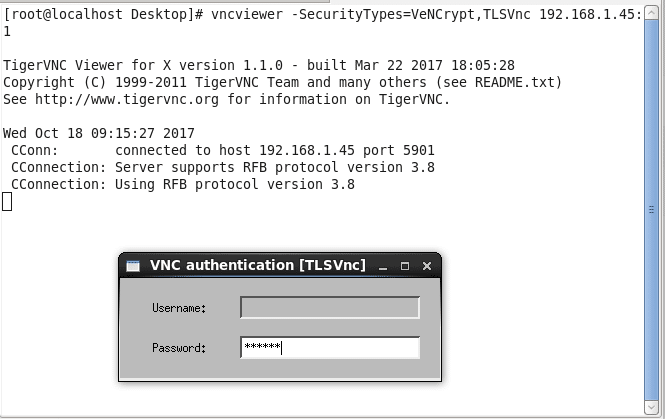
We can now access the server using the VNC viewer from the client machine, use the following command to start VNC viewer with a secure connection,
# vncviewer -SecurityTypes=VeNCrypt,TLSVnc 192.168.1.45:1
here, 192.168.1.45 is the IP address of the VNC server.

Enter the password & we can then access the server remotely & that too with TLS encryption.
This completes our tutorial, feel free to send your suggestions or queries using the comment box below.
If you think we have helped you or just want to support us, please consider these:-
Connect to us: Facebook | Twitter | Google Plus
Donate us some of your hard-earned money: [paypal-donation]
Linux TechLab is thankful for your continued support.

Thanks man, exactly what I needed.
No need to set a passwd for vncuser, it can be left locked.
I prefer the old but light MWM (yum install motif) over the full gnome desktop because it’s in the default rhel 7 repo and because I wanted to view just one application.
Also I could not connect with realvnc client due to the security settings but it was okay with tigervnc client.
Cheers.
Can this encryption be used also with VNCviewer for Android devices?