
Webalizer is a free & open source application for analyzing of apache web access logs & usage logs & creating website statistics. After analyzing web logs, it produces various website statistics like daily statistics, hourly statistics, Top URLs based on size, usage, hits, visits, referrers, the visitors' countries, and the amount of data downloaded etc, in a easy to understand graphical charts/pages. In short Webalizer makes it easy to understand the logs, which otherwise are not that easy to understand.
Though it is quite old application but its very effective & is a great alternative to Awstat. Its installation is also very easy to perform as its packages are available with base repositories of RHEL & CentOS. So let's start with the pre-requisites & installation,
( Recommended Read : Analyzing apache logs using AWSTAT )
Prerequisites
Since we will be monitoring apache web server logs, we will be needing system with apache installed. To install apache, run the following command from the terminal,
$ yum install httpd
( Also Read: Step by Step guide to configure APACHE )
Installation
As mentioned above, Webalizer package is available with base repositories & we can easily install it using yum. Run the following command to install webalizer,
$ yum install webalizer
If you are default settings of httpd.conf with a single server configured, then this is it. Webalizer is configured by default to fetch & analyze logs from default logs location. But if you have configured multiple web servers with virtualhost, then move ahead with the tutorial as we will discuss to integrate webalizer for multiple web instances in next section.
Configuring multiple WebServers
To use webalizer for multiple web instances, we will create a different webalizer configuration file for each web server instance,
$ mkdir /etc/webalizer
Now copy & rename the 'webalizer.conf' from /etc/ folder into your created directory
$ cp /etc/webalizer.conf /etc/webalizer/webalizer.test-domain1.com.conf
Similarly create the files for other domains as well & change the following parameter from the file to match each domain's configuration,
$ vi /etc/webalizer/webalizer.test-domain1.com.conf
& change
LogFile /usr/local/apache2//logs/test-domain1.com_access.log
OutputDir /usr/local/apache2/htdocs/test-domain1.com/webalizer
Save the file & exit. Now we will populate the webalizer directory with the logs by running the following command,
$ webalizer -c /etc/webalizer/webalizer.test-domain1.com.conf
We need to run this command every time we need to repopulate the webalizer directory with the latest lod data of webserver or we can also schedule this command to run every hour by creating a cron job. To create a cron job, run
$ crontab -e
& make the following entry in the file ,
0 * * * * webalizer -c /etc/webalizer/webalizer.test-domain1.com.conf
Accessing the weblizer
Now that the webalizer folder has been populated, we can access the webalizer by using the following URL,
http://test-domain1.com/webalizer
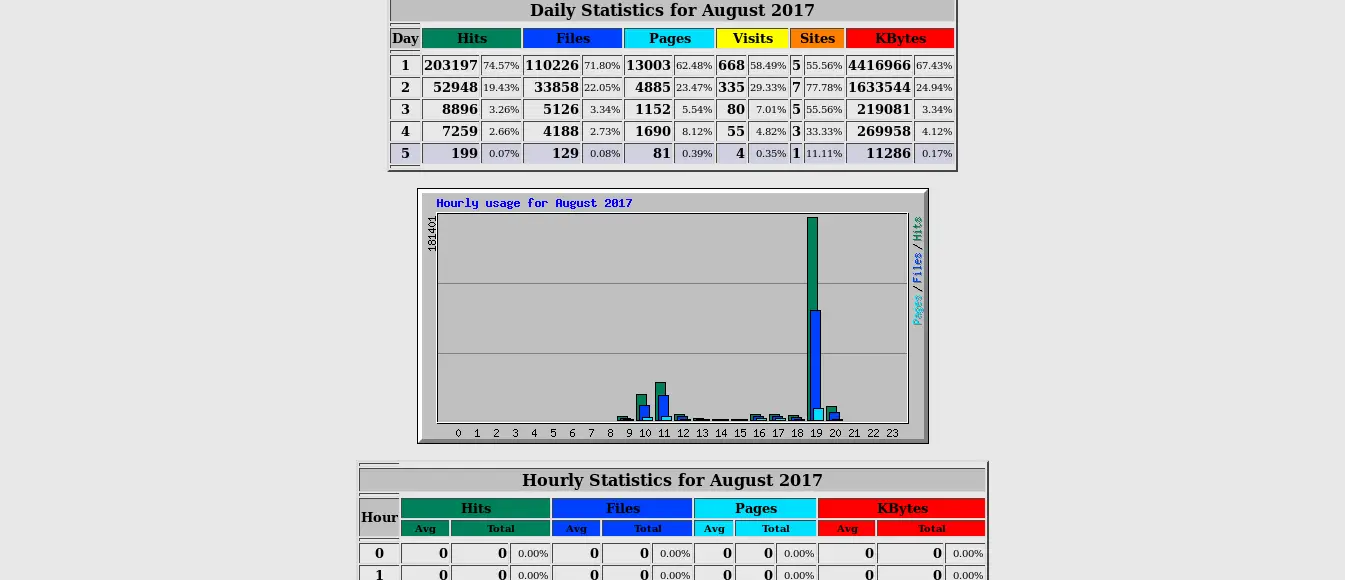
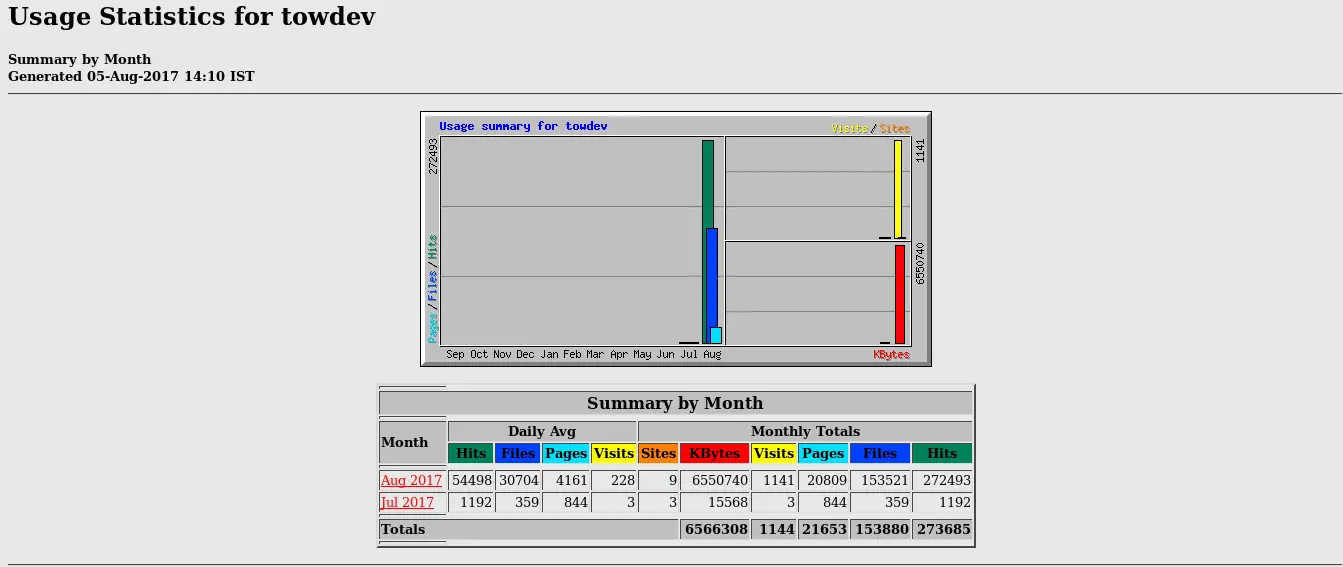
Now you check various reports generated by webalizer,

This completes our tutorial for configuring Webalizer to check website statistics. Feel free to leave your valuable comments & queries down below in our comment box.
If you think we have helped you or just want to support us, please consider these :-
Connect to us: Facebook | Twitter | Google Plus
Become a Supporter - Donate us some of you hard earned money: [paypal-donation]
Linux TechLab is thankful for your continued support.