
A Docker container provides a way to run multiple isolated systems on a single server or host. Each container shares kernel (& libraries also) of the host’s operating system. And since each container that is being used, shares OS with host, it makes docker containers very light in size. In-fact size of a Docker container can be in Megabytes (not GBs) & they load up extremely faster in mere seconds as compared to virtual machines that are GBs in size & take minutes not seconds to load up.
There are two editions of Docker that we can use, Docker CE & Docker EE.
Docker CE or Community Edition is ideal for individual developers and small teams that are getting started with Docker while Docker EE or Enterprise Edition is mainly used by enterprises and IT teams who build, ship, and run business critical applications in production.
Recommended Read: Create & manage docker hosts with Docker Machine on VirtualBox
Also Read: Step by step guide to create Docker Image
In this tutorial, we will learn to install Docker on Ubuntu & we will be using Community edition (CE).
Install Docker on Ubuntu
We will discuss two different methods to install Docker on Ubuntu
1- Using Official Repository,
2- Using Official Docker package (.deb).
Let’s start with installation using Docker repo,
1- Using Official Docker Repository
To add the repo on Ubuntu systems, open the terminal & add execute the following command to add the key for repository,
$ curl -fsSL https://download.docker.com/linux/ubuntu/gpg | sudo apt-key add -
Next we will add the repo using the following command,
$ sudo add-apt-repository "deb [arch=amd64] https://download.docker.com/linux/ubuntu $(lsb_release -cs) stable"
Next update the Ubuntu repolist with the following command,
$ sudo apt-get update
& then execute the following command to install Docker on Ubuntu system,
$ sudo apt-get install docker-ce
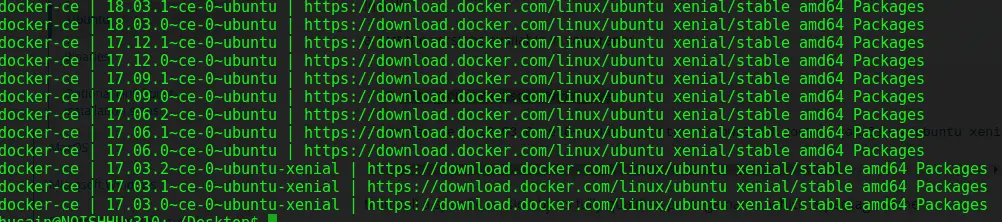
Or if you need to ia specific version of Docker, than run the following command to produce the list of all available versions,
$ apt-cache madison docker-ce
this will produce the list of all available Docker-ce versions in that repo,
Now to install the specific versions, run
$ sudo apt-get install docker-ce=<VERSION>
Docker is now installed & ready for use. Now let’s discuss the docker installation using .deb package file.
2- Using Official Docker package (.deb)
Now in order to install Docker using the package, we will first download the official package, AVAILABLE HERE. Download the official package based on your Ubuntu version.
After the package has been downloaded, we can install it using the following command,
$ sudo dpkg -i /path to file/docker.deb
Now that we have installed docker on Ubuntu system, we need to able to work with it & must know all the commands that we can use with Docker. We have prepared a detailed tutorial on “Important Docker Commands for Beginners ”, please refer to it.
That’s it, we now end this tutorial on how to install Docker on Ubuntu. If you have any questions or query & want us to resolve it, please leave it the comment box below. ADIOS !!!
If you have found this article to be useful, please share it among your friends/colleagues/followers. THANKS !!!
If you think we have helped you or just want to support us, please consider these :-
Connect to us: Facebook | Twitter | Google Plus
Donate us some of your hard earned money: [paypal-donation]
Linux TechLab is thankful for your continued support.