
In this tutorial, we will discuss how to install the VNC server on centos 7. VNC or Virtual Network Computing is a graphical desktop sharing tool. VNC server provides a duplicate of server display for the clients attached to it. A number of clients can be connected to using VNC.
In RHEL/CentOS 7, we use a package named “tigervnc-server” to setup the VNC server. We will now start with installation but before we do that make sure that we have a graphical version of the OS installed. If that’s not the case, we will first install the graphical desktop,
$ yum groupinstall “GNOME Desktop”
If you already have graphical packages installed, skip this step & move onto the installation of the VNC-server.
Recommended Read: Easy guide to secure VNC server with TLS encryption
Also Read: How to Install Zoom on Linux Mint 20
How to install VNC server on centos 7
We can install VNC server using the yum,
$ yum install tigervnc-server xorg-x11-fonts-Type1
Once the required packages have been installed, we will move to the configuration part,
Configuration
Configuration file for VNC is /lib/systemd/system/vncserver@.service. We need to copy /lib/systemd/system/vncserver@.service to /etc/systemd/system/vncserver@:1.service, where :1 is used to denote port number 5901 . We can also assign it to different port numbers like 2 or :3 (for 5902, 5903).
$ cp /lib/systemd/system/vncserver@.service /etc/systemd/system/vncserver@:1.service
Next, we will add user information to the configuration file. So we will add a user named 'vncuser' for accessing vnc
$ useradd vncuser
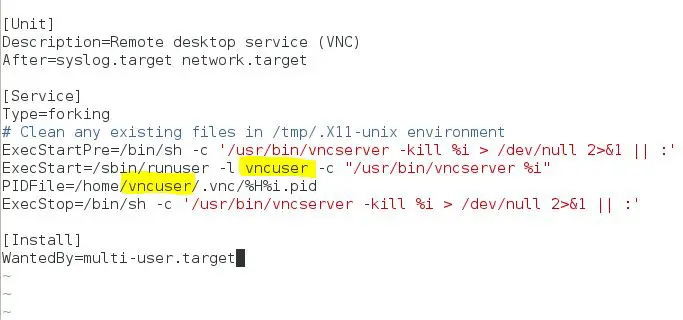
Now open /etc/systemd/system/vncserver@:1.service, & add user information (see screenshot)
$ vi /etc/systemd/system/vncserver@:1.service
Next, we will assign a password to access the VNC server,
$ su vncviewer
$ vncserver
You will be asked to enter a password & then confirm it & some files will be created after that.
Our VNC server is now ready to be used, we will restart the service & enable it, so it can restart on every reboot,
$ systemctl daemon-reload
$ systemctl start vncserver@:1.service
$ systemctl enable vncserver@:1.service
Note:- If you are getting an error while starting vnc service, reboot your system & try starting service then.
Testing the server
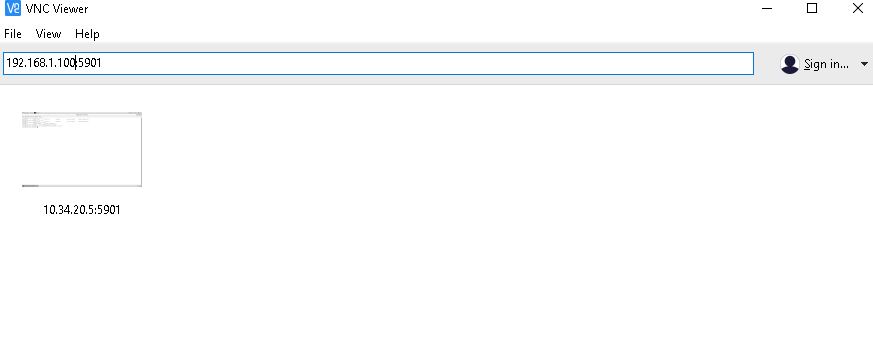
To test the vnc server, we require VNC-viewer to installed on the testing machine. I am using a Windows 10 machine with vnc-viewer installed.
Open vnc –viewer & enter the server address with port number
Next, you will get a warning if you are using an unencrypted connection, press “continue”
You will now be asked VNC password, enter the password to connect the session & you can see the display of the server.
If you want to add more user, repeat the whole process but change the port number from /etc/systemd/system/vncserver@:1.service to /etc/systemd/system/vncserver@:2.service or /etc/systemd/system/vncserver@:3.service & so on.
This concludes our tutorial on how to install vnc server on centos 7. We will be back with more tutorials. Leave your comments/suggestions down below in the comment box.