MySQL is one of the most famous Free & Open Source Relational Database system. MySQL uses a relational database & structured query language (SQL) to manage all the data.
Its one of the most widely used database servers in the world & also the main component of LAMP stack. It is being used for a number of top most websites like Facebook, Google, Youtube, Twitter etc.
In this tutorial, we will learn to install MySQL on Ubuntu machines. Installation is fairly simple & can be easily installed with default Ubuntu package manager i.e. apt or apt-get.
Recommended Read : MongoDB installation & configuration on RHEL/CentOS
Also Read : Important Logs to monitor to identify issues in the Linux system
Install MySQL on Ubuntu
As mentioned above, all MySQL packages are available with default Ubuntu repositories & can be installed using the following command from terminal,
$ sudo apt-get update && sudo apt-get upgrade -y
Next,
$ sudo apt-get install mysql-server
Now during installation, we will be asked to enter a root password for MySQL, please enter a password & remember it , as it will needed afterwards,

We have install MySQL on Ubuntu (this might also install some other packages to satisfy dependencies as well). MySQL service is started by default upon installation, but we can check with the following command,
$ sudo systemctl status mysql
If service needs to be started, use,
$ sudo systemctl start mysql
Configuration
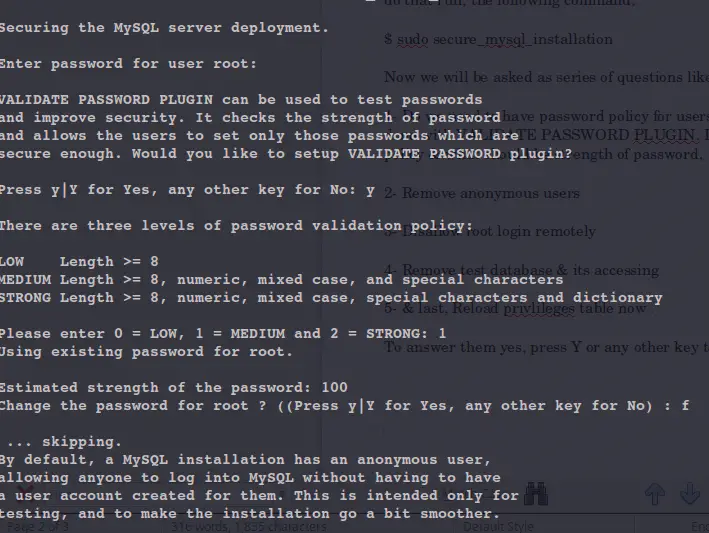
Once the MySQL has been installed, we need to secure the installation. To do that run, the following command,
$ sudo secure_mysql_installation
Now we will be asked as series of questions like,
1- Do we need to have password policy for users accessing the DB. This is done with VALIDATE PASSWORD PLUGIN. If yes, what level of password policy & what should be strength of password,
2- Remove anonymous users
3- Disallow root login remotely
4- Remove test database & its accessing
5- & last, Reload privileges table now .
To answer them yes, press Y or any other key to answer no.
After this is done, our database is now ready for use. You can login to mysql with your root account by running the following command from terminal,
$ sudo mysql
Than enter the root password to connect to database. Now all you need is some commands that will get you started on using the MySQL database server. You can find an article MariaDB Administration commands for Beginners (Don’t worry all the commands work for MySQL as well). You can also check out our guide on Step by step guide to reset root password in Mysql .
This was our tutorial on how to install MySQL on Ubuntu. Please feel free to send in any questions or queries using the comment box below.
If you think we have helped you or just want to support us, please consider these :-
Connect to us: Facebook | Twitter | Google Plus
Donate us some of your hard earned money: [paypal-donation]
Linux TechLab is thankful for your continued support.
Please do also check my article at https://thelinuxgurus.com/how-to-install-mysql-on-ubuntu/.